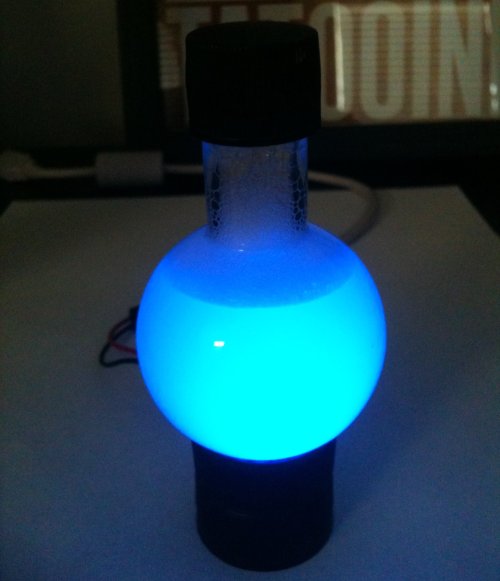
You know those glowing potions you pick up in many fantasy video games (hopefully right before a boss fight)? This is a quick project that makes a glowing, USB-powered potion that looks great at your cubicle/desk/office and shows off your geekiness. Unfortunately, no matter what I tried, I could not take a picture that does this justice. It looks amazing in person though, trust me – it’s very blue and bright.
Backstory: when I first got my blue Scion xA, one of the first things I did was swapped out all the dash lights for blue LEDs and installed blue LEDs under the cupholders so it would make any translucent beverage container glow bright blue. When I saw these mana potions at ThinkGeek, I immediately thought those would look cool if they similarly glowed blue. So, this is how I did it…
Supplies
- Mana/Energy Potion – This is the most expensive part. They are made by a company called Harcos and actually come in red, blue, and green but the bottles are all the same (clear). They are $4 when bought individually or $3.33 if you buy a six-pack. Plus shipping. I ended up waiting til in was going to order from ThinkGeek anyway and sent an email out to my coworkers to see if anyone else wanted one and I split the cost of a six-pack plus shipping with them. Amazon and a few other places sell them also as does Harcos itself.
- USB cable – can be any cable as long as the end that plugs into the computer is present. Longer is better than shorter since a longer cable opens up more options for placement on your desk.
- (blue) LED – For my car project, I bought blue LEDs prewired with the proper resistor but you could add a resistor yourself if so inclined. You can use any color LED you want, but I think blue looks great (but I have an abnormal fascination with blue LEDs). You could even use a color-changing LED if you wanted your potion to change colors (I tried this but didn’t like it). You could also use an infrared LED that will react with the Tide in the water. That should look really cool too.
- Two soda bottle tops – I wanted black so I used two from Coke Zero.
- Tap water
- Powdered laundry detergent (I used Tide)
Tools
- Wire cutters
- Wire strippers
- Electrical tape or heat shrink tubing
- Soldering iron and solder
- (optional) Drill with smallish bit
- (super) glue
Total cost (assuming you have the tools on hand)
- $3-$4: Mana/Energy Potion
- $1 (or free): USB cable
- $1: LED
- Free: 2 Coke Zero bottle Caps
Total: about $5 or so
Time: an hour or so?
Steps
Wire up the LED to the USB cable. I’m not going to go into detail about how to do this. There are tons of tutorials on the internet (this tutorial is pretty good) on how to do it and it’s an extremely useful skill to know how to wire something to the 5 volts in a USB plug. Google is your friend. I have converted quite a few things to be USB-powered by doing this. Once you do this, make sure plugging your LED into a USB port causes your LED to turn on. If you wanted to get fancy, you could put in a switch. I didn’t. Plug it in, it’s on. I bought my LEDs pre-wired with a resistor so I didn’t have to bother with that but you could do that too.
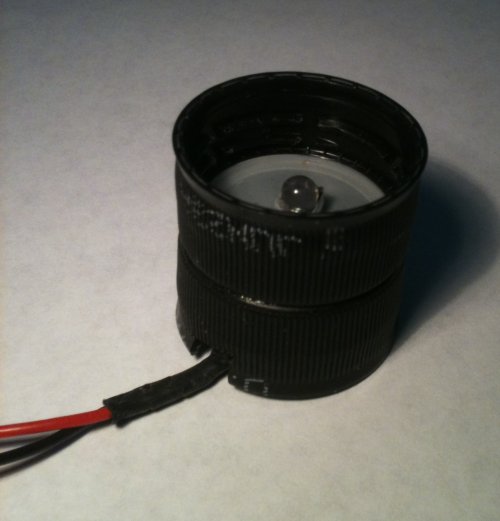
Make your stand. Put a hole in the middle of both bottle caps that is just big enough for the LED to slide through. I didn’t use a drill, I just used my pocket knife. It doesn’t have to be pretty because it will be hidden. Make sure the entire LED can fit through so you get maximum light. Now, without the LED in, (super) glue the two caps so that their tops are together. Once dry, put the LED through so it pokes all the way through and glue it in place if needed with super glue or hot glue. Mine fit so snugly I didn’t glue it in place. Now, cut a notch in the bottom of the bottom cap so the wire has a place to go when it’s sitting on your desk. Again, I think I used my pocket knife (be careful). You could line the area around the LED aluminum foil (shiny-side up) to increase the light going up through the bottle too, but I didn’t do that.

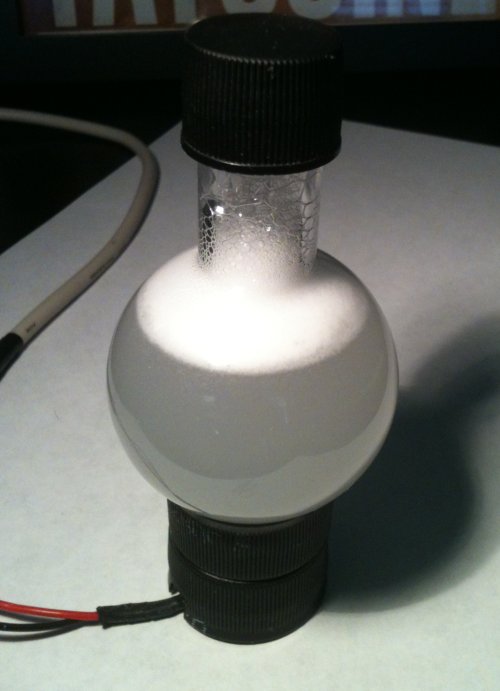
Prepare your bottle. Remove the wrapper on the bottle that identifies which type it is. If you wanted to, you could use your bottle as-is with the energy drink inside (though it wouldn’t glow the same), but that’s a waste of an energy drink. Drink it! Get amped! WooHoo! Ok, now, rinse the bottle out and fill it halfway with water. Remember in the supplies list I had powdered laundry detergent? Here’s where we use it. Put a dash of it in the bottle, shake well, then fill the rest of the way (but leave some room at the top with air). The reason for the detergent is that with just plain water, the light from the LED just goes through and doesn’t look impressive or glowy. With a pinch of detergent, it diffuses the light and makes the potion fully glow and it looks magical. I think I put too much detergent in mine (or maybe it’s normal), but I have to shake mine every few days to re-dissovle it. I have had mine for over five years and have not had to change the water – maybe the detergent retards growth of little nasties?

Put it together. Plug your USB stand into a USB outlet and set your bottle on top. Enjoy the glowing magic potion and be the envy of your cubemates!
Tutorial: Glowing USB Magic Potion:
You know those glowing potions you pick up in many fantas… http://t.co/ocXEkj1qa5 -danferguson.me
Check out this tutorial on @geekcrafts today – USB-powered Glowing Mana Potion Lamp: http://t.co/jytdhLDr6m #handmade #geek
That IS cool. Am tempted to try this with some reclaimed science lab flasks and so on for a ‘mad scientist’ work area :D