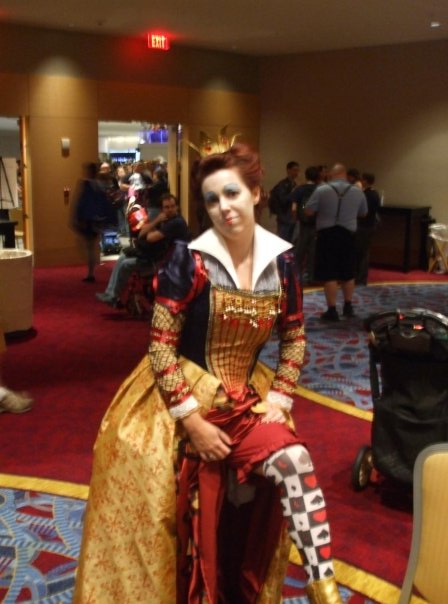
My friend Ruth Suehle sewed, beaded, wired, embroidered, and stamped herself an incredibly intricate crown-to-toe Red Queen costume for this year’s Dragon*Con — and won the Best Journeyman prize for her handiwork!

photo by Weston Clowney; all other photos by Ruth Suehle
I asked her how she made it, and she had lots of details to share…
When I first decided to work on the Red Queen’s costume, I had only one picture to go on. This one. I was planning to wing it for everything below the waist.
My first step was to figure out if I could do what for me would be the three hardest things: Get my hair that red without bleaching it, cover my eyebrows without shaving them, and make the collar stand up like it should. With the answers (respectively) of Manic Panic, this drag queen’s video, and “umm…I’ll figure it out with some stiff interfacing,” the project was underway.
After I got started, the photos from the August issue of Vanity Fair came out with the full-length shot. They also included one that showed her tights, bloomers, and shoes. That meant more work to do! Fortunately, I found the tights on yandy.com (that site is not SFW!) and a pair of usable boots at a thrift store, which I painted gold.
I didn’t get my hair quite flaming red, but I can attest that Manic Panic Rock ‘n Roll Red will get you pretty red over medium-dark brown hair with no bleaching.
Fabric breakdown by part:
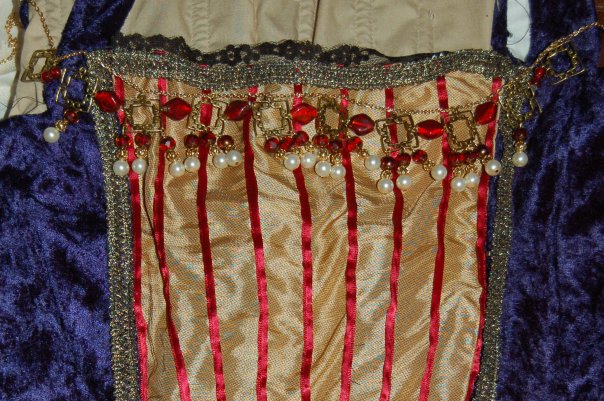
Bodice: gold taffeta with black tulle overlay. Sides and back of blue panne velvet. Detail in ribbon, lace, and trim.
•Hand-beaded top using wire, ribbon, beads, and findings. Matched detail as closely as possible (for example, counted 20 sets of pearl drops).

•Blue sleeves attached to bodice. Ribbon on sleeves hand-beaded.
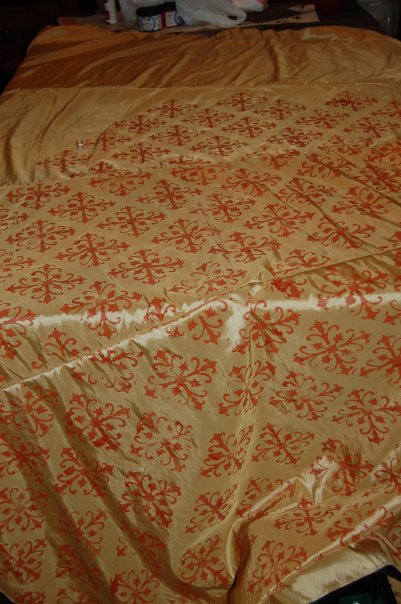
Overskirt: Gold taffeta stamped to resemble pattern in original costume.

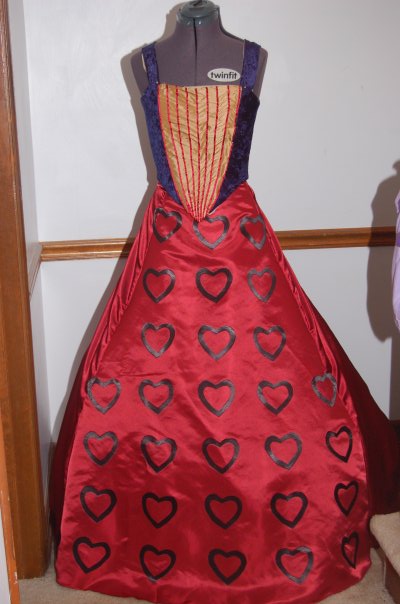
Underskirt: Red taffeta.
•Black hearts created from satin with Wonder Under adhesive.

•Gold hearts machine embroidered, cut, and sewn loosely in centers of black hearts.
Shirt: white cotton with navy tulle overlay. Yellow/gold stretch knit sleeves. Detail in beaded ribbon and white cuff trim.
•Black webbing hand-knotted with 80 yards of embroidery floss.
•Gold sleeves are attached to undershirt.
•Shirt is attached to corset foundation.
Crown: foam sheet, wire for shaping, rhinestones, textured paint, gold
Skirt foundation: (not pictured) white muslin and boning
Bloomers: Burgundy cotton with machine-stitched scallop hem
Color choices
The colors are a bit different from the first pictures that came out to the Vanity Fair photos as well as those I’ve seen from when the costumes were on display at Comic-con. More vibrant, for one. And in that first one, the upper sleeves and undershirt looked to me to be clearly blue, whereas in the others, they appear to be black. I usually wouldn’t be excited about combinations of blue and black, but since I’d already bought fabric, that’s the way I went, and I think it works.
Thank you so much, Ruth! You can see another shot of the Red Queen (with the Mad Hatter!) here.


