Search Results for: sewing

April 13

Huggable Monster Dolls for Kids in Need

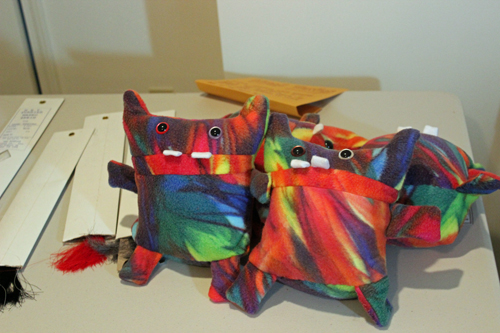
Monsters01

A Monster to Love is this great online shop where, for every cute little monster doll you buy, Sam, Ben, and their dad Ray, donate a monster doll to a kid in need.  They partner up with children’s hospitals and even the World Relief Refugee program out of Atlanta.

I ran across their awesome work about a year ago on Craftsy, including a pattern to make your own monsters to donate to local kids in need, or send off to Ray and his boys in Colorado so they can donate the cuddly little monsters to kids in need.

Interested? Here’s the A Monster to Love PDF Pattern and Instructions.  Ray and his boys take donations year round, and you can send them one monster, or one hundred. It’s up to you!

I try to organize a Monster Making Party at least once or twice a year–they’re fun, and pretty easy to do.  Here’s how:

1. I buy a couple yards of fun colored fleece fabric when it’s on sale (usually in the summer).  You can get quite a lot of monsters out of a yard of fleece, or even half a yard. Just be sure to shop when it’s on sale! Along with fabric, I’ll pick up a box of stuffing when it’s on sale too (or with a coupon).  One box can last a long while and stuff a lot of monsters (probably around 30).  I’ll also purchase Safety Eyes for the dolls, which can be attached before sewing, and don’t require any sewing knowledge to install.  I purchased my Safety Eyes here, but there are tons of vendors and craft stores out there that sell them.  The 18mm sized ones are what I used, and I liked to mix and match colors too. 15 pairs of eyes cost about $15.  You can also use buttons for the eyes, but make sure they are SEWN on really well.  If the eyes are not sewn on securely, Ray and his boys can’t use them.  Do not glue on eyes.  Ray and his boys can’t use the monster dolls if the eyes have only been glued on (hello choking hazards!).

All in all, I spent about $40 on supplies for making the monsters, but I did it over the course of a couple of months.
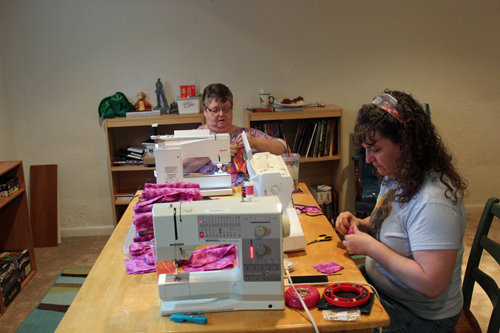
AngieSewing
Angie brought her own sewing machine and helped build a couple monsters. That’s my mom in the background stitching away madly.


2. I set up a FB event and ask folks to bring their own sewing machines if they’ve got them, but I also tell folks that there’s plenty of other ways to help too: attaching eyes, stuffing, cuddle testing, and hand stitching are great ways to get even the most novice of crafters involved in a Monster Making Party.   Along with the fabric, stuffing, and safety eyes, I also bring along thread, scissors, and hand sewing needles for people to use.  If you’re worried about materials cost, you can always ask people to pitch in a couple bucks to help out.

3. I cut out at least some monsters before the party so there are dolls ready to be sewn.  I also set up stations for people to work at installing eyes, stuffing the monsters, and hand sewing the monsters closed after stuffing, and even cutting out more monsters if necessary.
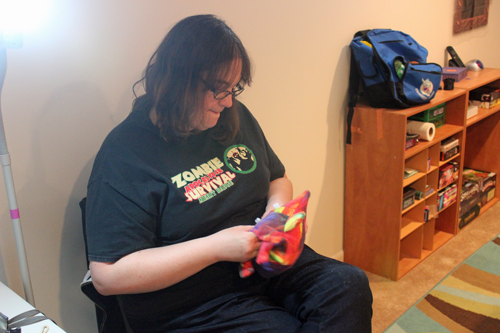
ChrystalSewing
Here, my friend Chrystal is stuffing a monster.


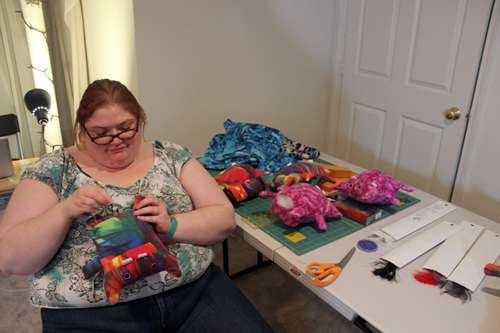
EuniceSewing
Eunice is hand sewing the monster closed.

4. We have music playing, and I ask folks to help out with some food (like chips and dip, cupcakes, and frosty beverages).  And I invite folks to come when they can and stay as long as they’d like to.  It’s a fun way to spend an afternoon or evening.

5. I’ve found three hours to be a great length of time for a Monster Making Party.  You can get a lot done, have time to chat, and still steal a cupcake too.  Once the party’s over, you’ll want to box up your magnificent creations and mail them off to A Monster to Love! Their address is on the last page of the PDF.
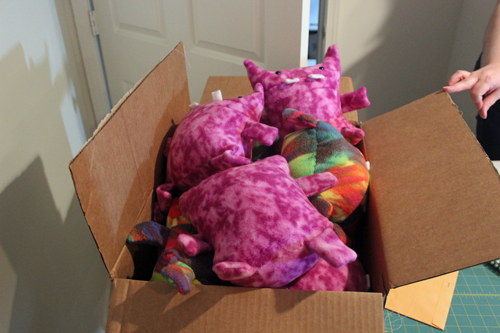
All our Monsters boxed up and ready to go!

If you have your own Monster Making Party, be sure to take pictures and share!!!


More Links of Interest


March 27

Return of the Geek Cat

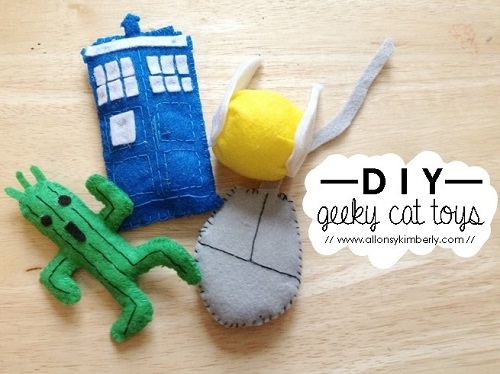
cat toys2

There was a lot of celebrating on the farm today.  After three weeks and two days, we finally found our cat, Ari!  Apparently he was hiding out in our closest neighbor’s shed the whole time.  I was pleasantly surprised that even after a 23 day stint in the pitch-dark shed he didn’t really resemble Gollum at all.

In addition to more cuddles than he’s comfortable with, I’m making him these geek cat toys as a welcome home gift.  (Underneath that cool cat exterior, I have no doubt that Ari is a total Whovian, Final Fantasy, AND Harry Potter nerd.)  The best part?  No sewing machine is needed for these adorable toys from Allons-Y Kimberly.

Oh man, remember when we posted this?  What a charming place for a geek cat to hang his hat!

Category: Craft, Geek, Toys, Tutorial | Comments Off on Return of the Geek Cat
February 23

Plushy DIY Roundup!

UniPug

This week on Spoonflower, the contest involves original designs for mythical creature plushies, and when I saw Gila’s UniPug design I knew I had to share it on Geek Crafts.  You can purchase your own DIY UniPug Plushy Pattern on a variety of fabrics (I recommend Spoonflower’s new Minky fabric for this one because it’s super soft and cuddly, like the ever elusive UniPug himself) in Cross The Lime’s Spoonflower shop.  The design fits on a fat quarter and costs about $17 with shipping.

GrumpyCat

If you’re more of a cat person, you might enjoy making your very own Grumpy Cat with this Instructable by username elewis03, complete with step-by-step instructions and pictures, as well as a rudimentary pattern you can download for free.  This little guy would make an excellent cubicle pal at the office, don’t you think?

FrogPrince

If grumpy kitties and mythical unipugs aren’t your thing, how about a Frog Prince named Ferdinand from Abby Glassenberg’s blog While She Snaps? This DIY has a free downloadable pattern along with excellent pictures and instructions.  While you’re there, you should check out the other free plushy patterns on Abby Glassenberg’s site–super cute!

Category: Craft, Geek, Toys, Tutorial | Comments Off on Plushy DIY Roundup!
February 16

Geek Chic Clothing DIY Roundup

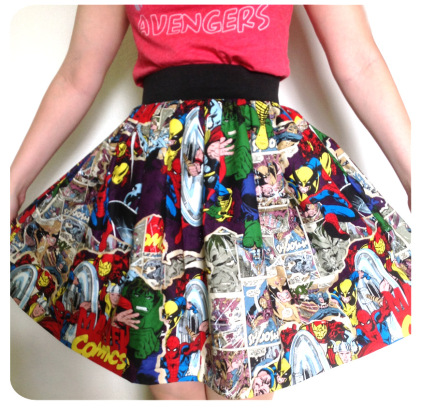
GatheredSkirtDIY

These days more and more people are rocking their personal geek chic style than ever before. So I’ve rounded up some fun DIY tutorials on starting (or adding to) your own geek chic wardrobe for everyday fabulousness. Take this awesome gathered skirt tutorial from the blog Set to Stunning by Lindz and Scruffy. It’s an easy-to-follow tutorial with pictures, and the idea is so simple you can use any fabric you want. Heck, make a bunch of these beauties, one for every day of the week if you like.

SequinGodzilla

If sewing isn’t your thing, then perhaps peel-n-stick is more your style. Maya Murillo from the blog I Love to Create has a quirky and quick video tutorial on making your own sequin Godzilla shirt, no sewing required. It’s a cute idea, and another one you can easily customize without a lot of effort. She uses Aleene’s Peel and Stick Sheets to adhere the sequined Godzilla to a t-shirt. I haven’t used the product myself, but it’s gotten some mixed reviews. If you want an alternative, try Wonder Under Fusible Web. All you’ll need is an iron. Be sure the fabric you’re using for the Godzilla shape is ironing friendly, however (so, maybe glitter instead of sequins).


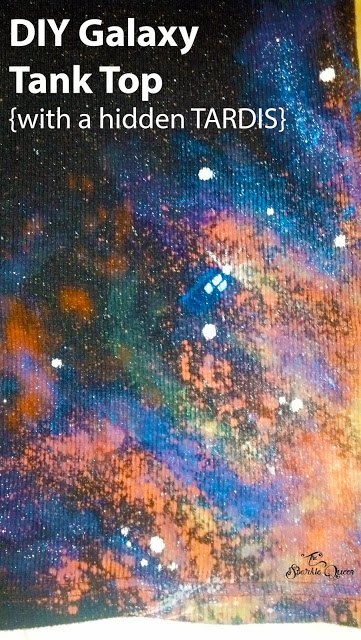
GalaxyShirtDIYwithHiddenTARDIS

If you’re feeling a bit more artsy, then Alessandra from The Sparkle Queen has a nice photo tutorial on making your own galaxy shirt with a hidden TARDIS using bleach and paint. The process is similar to another technique featured here on Geek Crafts. Though Alessandra uses acrylic paints, if you’re looking for something that won’t change the hand of the fabric as much (you know, make your shirt feel a little crunchy once it’s all done), try some fabric paints designed to have a softer feel on fabric once dry. I’ve used Pebeo fabric paints before with good results myself, but there are tons of products out there available at your local craft store. Or, if you’re feeling really adventurous try out Dharma Trading online for some really excellent fabric paints, techniques, and tutorials. You can even get clothing blanks from them too.

Have fun spicing up your wardrobe!

Category: Comics, Craft, Geek, Girly, Movies, Sci-Fi, Tutorial, TV | Comments Off on Geek Chic Clothing DIY Roundup
February 15

Doctor Who Craft: TARDIS bag

TARDIS bag by Jade Falcon

Sometimes you just need a bag that’s bigger on the inside. That’s where Jade Falcon comes in. She has posted a very detailed account of her process for creating a TARDIS shoulder bag to take with her to cons.

I loved her write-up of how she came up with the design, then modified it after a trial run before hitting a con. As a not-so-great-seamstress myself, it was fascinating to read how a pro attacks design issues to come up with a winner of a project.

Have you ever created a project, then gone back and reworked it after a test run? We’d love to hear about it in the comments section below!

Links of Interest:

Category: Geek, TV | Comments Off on Doctor Who Craft: TARDIS bag
November 30

Ironing Board Do-Over

Star Wars ironing board by The Geek Forge

Got a stash of geeky fabrics, but not sure what you want to make with them? Jen at The Geek Forge has put together a great step-by-step tutorial for recovering an ironing board with Star Wars fabric. She makes it look pretty easy!

Be sure to also check out their Etsy shop for geek accessories and art. 15% of all profits go to Hero Initiative, a charity which helps comic book artists.