Mini R2D2 Pattern

Mia posted her mini R2-D2 pattern back in 2002, on her crochet site. This Mini R2-D2 measures about 17cm. The idea to make R2-D2 came to Mia from a birthday gift for a friend, who really likes Star Wars.

This time, Mia decided to innovate and used some LEDs on R2-D2, so, it works as a small lamp. But the pattern can be worked without the electronic parts. You can replace the LEDs for some buttons.

The difficult part of this pattern it isn’t the crochet, but the collage, because there are to many details to cut and glue! Mia recommends to pay attention on the photos and to search on the web for R2-D2 photos, so, you can have a good idea of what you will need to do.

Crochet BMO Scarf

close-up-of-bmo-scarf

Rose Henderson actually wrote this crochet pattern in 2014, but since the southeast part of the United States is finally starting to get chilly, I thought it was time to share this.

Rose said her 9 year old asked if she could make him a scarf that no–one else had at school. They compiled a list of his favorite TV programs, had a look around to see what was available in local stores and whittled the list down to BMO from Adventure Time. Thoughtfully, Rose posted her entire tutorial on this scarf on her blog, and even included a PDF of the pieces of BMO’s face, to trace onto felt.

Amazingly enough, this was Rose’s first crochet tutorial and it’s very clear and concise.

Jake the Dog Plastic Bag Holder

175179_09oct16_img_20160809_172433

Teaandcraft of Perth, Australia, has a practical side that I appreciate. She decided recently she really needed a plastic bag holder, and that it should totally look like Jake the Dog from “Adventure Time” on Cartoon Network.

Her Jake has a 65cm long torso and, including his arms and legs, is about 118cm long in total. He is only 14cm wide though; but she can’t decide if she likes the skinny look best (because it kind of looks like he really has stretched) or if she should have made him wider.

Personally, I like the long and skinny Jake, because it looks like he’s changing size to me.

For more details on how Teaandcraft made her Jake, check out her posting here.

Make Your Own Octopi Amigurumi Army!

babyoctopusamigurumicrochetpattern_aiid477734

You don’t have to make an army of them, but why wouldn’t you? Check out this free crochet pattern, designed by Adorably Kawaii on Craftsy. It’s a beginner level pattern with pictures, and did I mention it’s free? I imagine it would be a great scrap buster too, and it would be easy enough to replace the safety eyes with buttons if that’s what you’ve got on hand.

More Links of Interest

Simple Crafts For Halloween

fdsjyhy

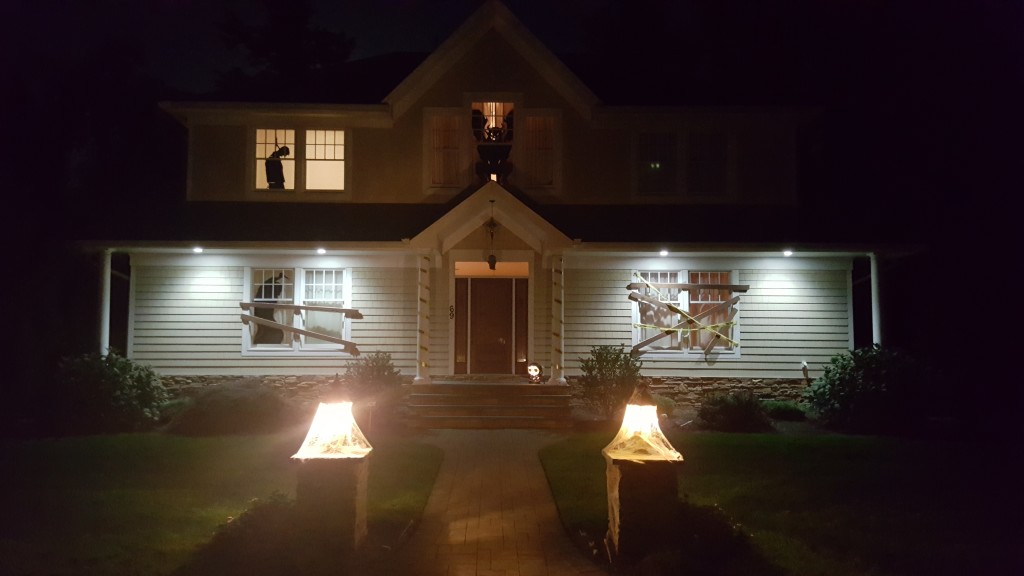
Sometimes, the best Halloween decorations are the simplest. Case in point, check out the windows in this house. The creatures you see in the windows are spray painted, flattened cardboard boxes. The boards are on the lower windows are painted polyurethane foam board that was cut into “planks” and painted.

SneakersRobinson posted his Halloween decorations recently to Imgur. He said he finally got his own place after living with roommates for a while, so he decided to do Halloween right this year by making his own Halloween decorations.

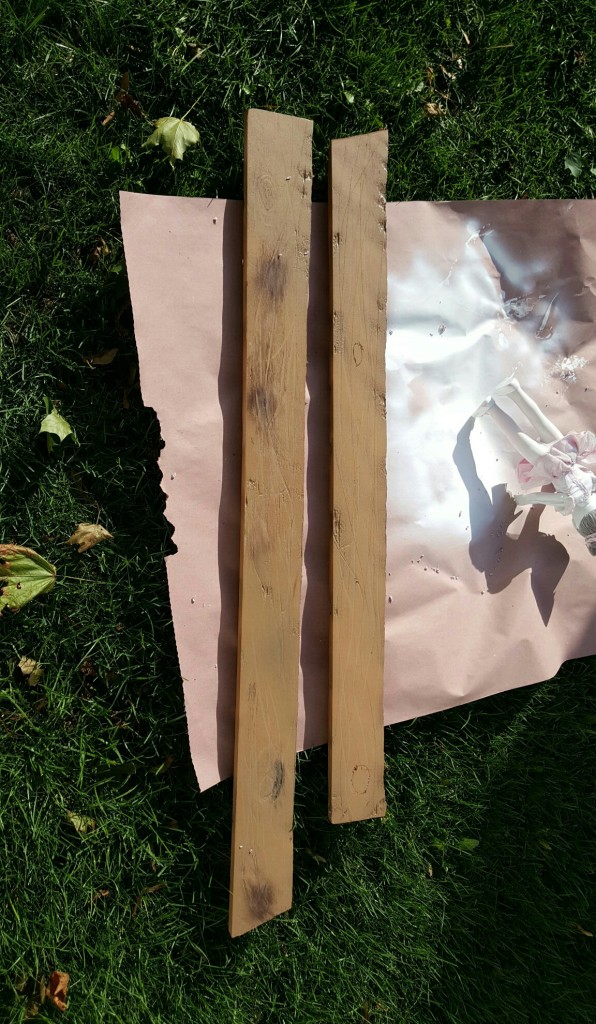
He started by making fake 2×4’s, by buying big sheets of polyurethane foam board and cutting them into planks. After cutting, he used a nail to make groves and some knots into the “wood”. From there, he got some light and dark drown spray paint and got to work. He said he also noticed that if you spray some spots excessively the paint will eat away some of the foam board which made making the knots a lot easier.

7oysgmq

He then got the largest boxes he could find and cut them so they would lay flat. He looked online for some inspiration and started drawing an outline by freehand. After he had his outline, he cut them out with a box cutter.

cp3f9ag

j6xj0nn

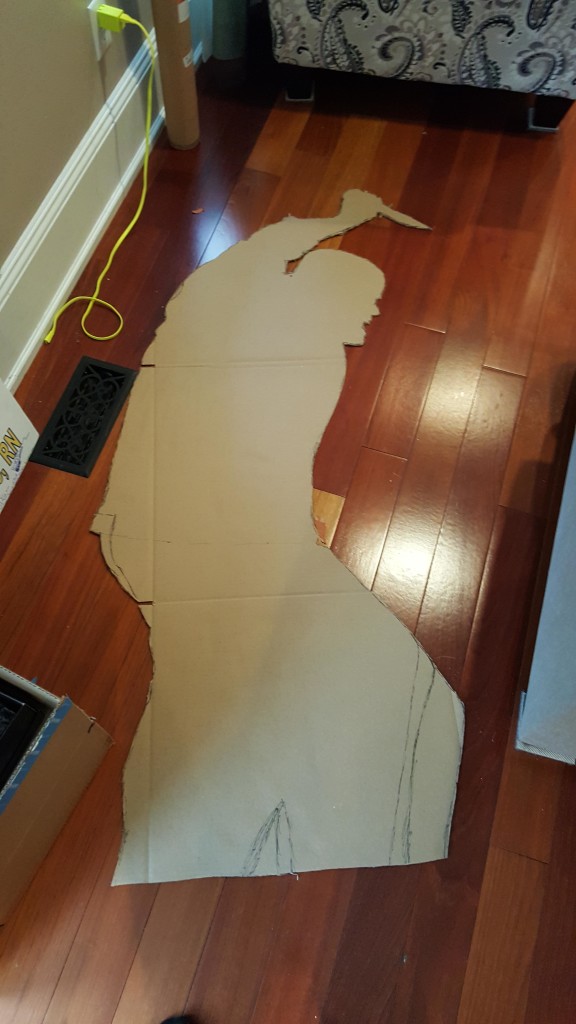
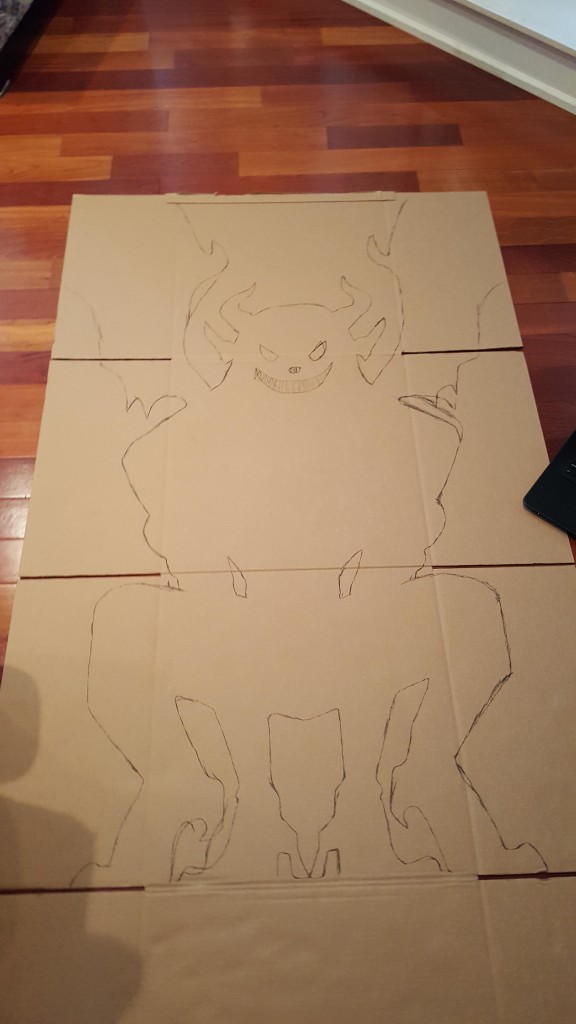
After they were all cut out, he spray painted them black so they looked like shadows in the windows. When he was ready to start decorating, all SneakerRobinson had to do was place these guys in his windows.

Go Old School With This Halloween DIY

diy-cloche

If you’re into the classic, Victorian, and vintage style Halloween decorations, then you’re going to love this tutorial from DIY Home Sweet Home where you can make your own Halloween themed cloche using the simplest of materials. The tutorial only covers making the cloche itself, so filling it will be up to you and your imagination.  If you need ideas, then try looking at these terrariums to start! Use your homemade cloche to display Halloween scenes, vintage inspired ephemera, miniatures, and anything else you can think of.

More Links of Interest