You’re Not Seeing Double!

TwoStanLees

What’s better than meeting Stan Lee? How about meeting two of of one of the greatest creators in comic book history? Photographer Chris Dorsey was there last weekend to capture the magic as cosplayer “Agent Stan” met his real life counterpart, Stan “The Man” Lee at Planet Comicon in Kansas City.  Surrounded by the IBOTs (Iron Brothers of Topeka, KS), Dorsey documented all the fun, including some incredible cosplay all weekend at the convention.  Check out more of his excellent photos on his Facebook Page!

More Links of Interest

Dark Phoenix-Inspired Ballgown

cWfoNml

Wavecrestian recently showed off her Dark Phoenix inspired ballgown. She spent the last two or so months working on it. The dress was modified from a commercial pattern but the design is all her own. She had to create a petticoat design to support the skirt since the actual petticoat pattern didn’t have enough floof!

Wig and crown and gloves to come! Unfortunately, I can’t find her anywhere else online, so I don’t have any more info available about the dress. Basing a previous Imgur post from her, I’m assuming this is going to be for cosplay somewhere.

Make Your Own MLP Inspired Pegasus Wings!

PonyWings

I’ve been up to my eyeballs getting ready for Planet Comicon in KC, and something I’m introducing this year is MLP (My Little Pony) Inspired Pegasus Wings. This great video tutorial by Anonymous Woodsprite Cosplay Accessories got me started (though I used this awesome video tutorial as more of a jumping off point to my own version). The video tutorial is fantastic and takes you step-by-step through making your own pair of pegasus pony wings, starting with what materials to use and how to make your own pattern.  There’s even a bonus section at the end on making a matching pair of pony ears.  So, get your MLP cosplay on and make some awesome MLP Inspired Pegasus Wings of your own!

More Links of Interest:

Make Your Own Lightsaber!

DIY lightsaber by Shawn Jolicoeur

Ever wish you had your own Star Wars lightsaber? Now you can, thanks to this video tutorial by Geekbuilder Shawn Jolicoeur!

His video gives a brief overview of the steps he took to build a lightsaber from a metal pipe. Very realistic-looking!

The YouTube video also includes an epic lightsaber battle with his younglings, complete with cosplay!

What sci-fi gadget do you wish you had? Let us know in the comments!

Links of Interest:

Han Solo’s Blaster From “A New Hope”

hanblaster

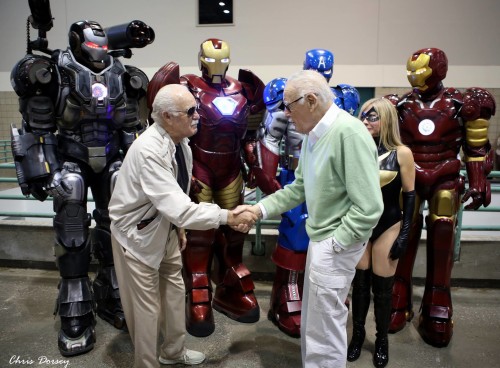
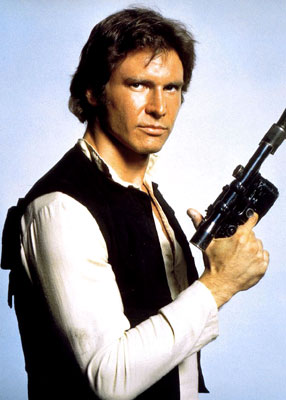
This is actually a tutorial I’m following myself: recreating Han Solo’s blaster from Star Wars, Episode 4: A New Hope. I started off with the orange and white costume gun from Amazon. OB1Al wrote this tutorial as someone with an interest in making a variety of movie props.

Lightly sand the blaster with a fine grade sandpaper, remove the lettering on the side this way too. Prime with grey auto-primer and leave for a day or two to dry. If you intend to take this blaster to any cons, you may want to leave the end of the barrel orange so it’s still event-appropriate. You can just cover it with some tape when you hit it with the spray paint.

Add a base coat of silver (just use regular silver, NOT metallic silver as it doesn’t take the top coats very well). Leave to dry again. Add a coat of matte black paint. Once it’s dry. highlight the barrel and sight with a gloss black, to add a bit of depth to the paint-job.

Now, using fine grade sandpaper, CAREFULLY begin the weather the blaster by removing parts of the black paint, exposing the silver color underneath. Try to pick areas which would naturally receive wear and tear from normal use. You can also add some weathering topically (i.e., with a small artist brush in places). Weather the sight with some brass colored paint for greater authenticity.

Now, choose a nice brown wood-colored enamel for the grips. Carefully paint in the two sides of the grip and leave to dry. Once dry, spray a little bit of the matte black onto a saucer and dip your finger in it, wiping off most of the excess. Carefully rub some of the black into the brown grip area, giving some depth to the paint and weathering the area. Finally, use your brass colored paint to paint the ‘screws’ in the middle of the grips.

Spruce Up with a Hobbit Door Wreath

Hobbit Door Wreath from Set to Stunning

Now that nicer weather is more predictably ensconced, you might be in spring cleaning mode. Or maybe you’re past that, into “this place needs some sprucing up” mode. How about a nice new door wreath…with a touch of geek? Scruffy over at Set to Stunning has just the project tutorial for you – a Hobbit door wreath!

I like that she “added oomf” to her acorns with glitter and Mod Podge, and that this wreath was originally intended as holiday decor, but now is a year-round essential.

I also love that by creating the wreath, you’ll “be the envy of those you don’t know half as well as you would like, and those you like half as well as they deserve.”

Links of Interest: